Signing up to ConnectTrades is pretty simple. Just fill up the required information on the registration form, then hit Register!
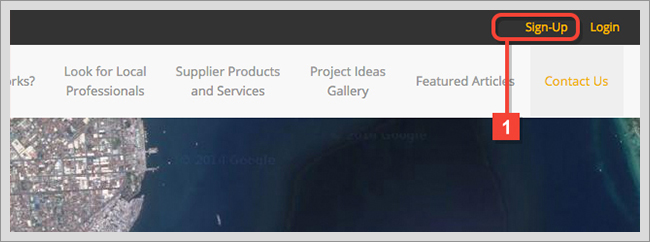
1. On the right most of the top bar, click on Register. This will direct you to the registration page where you will provide the necessary information for the registration process.
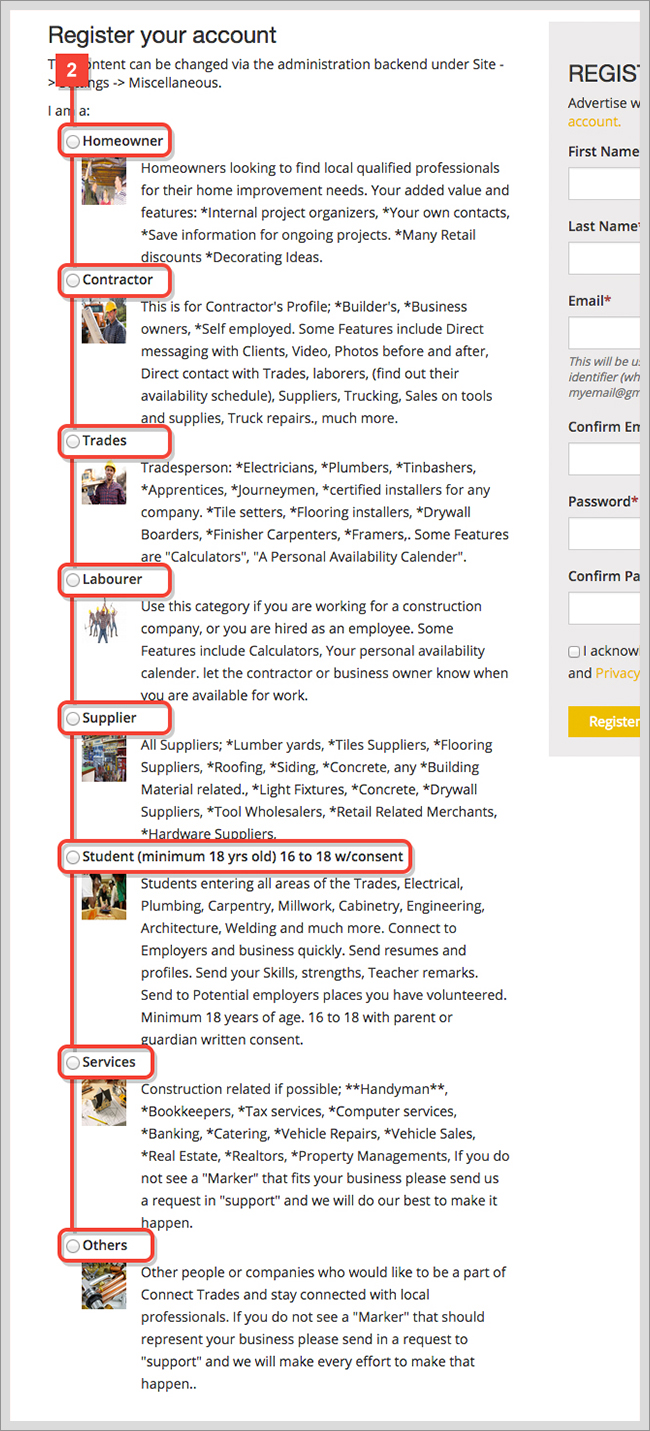
2. In the left hand side of the registration page, select what type of account you would like to sign up for, we have a selection of 8 profile types to choose from that's catered to the specific needs of each user type. Note: This cannot be changed in the future, so be sure to select the one most appropriate for your needs.
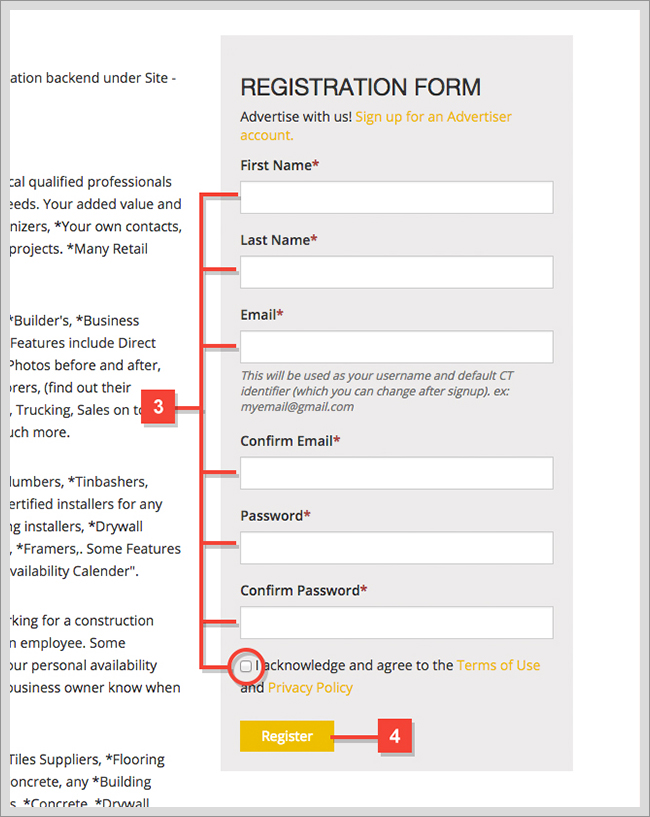
3. In the right hand side, you will see several input fields asking for some basic information for your account. Simply fill these in, agree to our Terms & Conditions and Privacy Policy and click on the Register button.
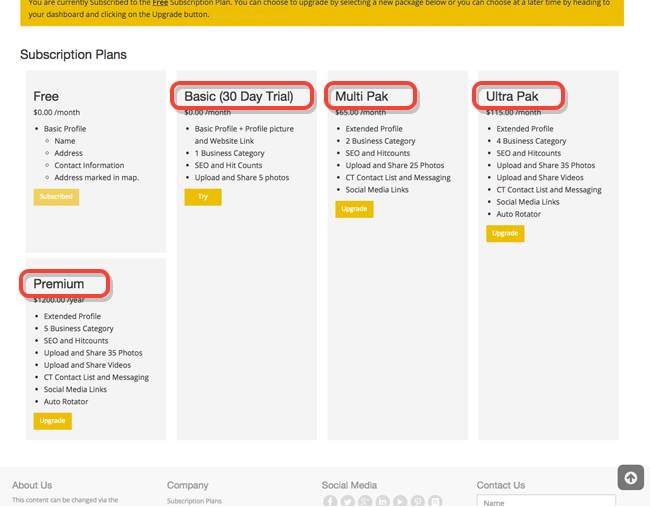
4. Clicking on the Register button will take you to the Subscription Plan page. Here you can choose to upgrade your subscription plan or proceed to the profile page and stay on a Free Account.
Once you've completed the registration process, you can now login into your account any time in the login page. Enter the email address you used at signup and enter your password. If all is good, you will be logged in and taken to your personal dashboard.
ConnectTrades has several subscription plans to choose from. Ranging from a Free Account to a Premium Account. Upon registration, you will be signed in with a Free Account, which you can choose to upgrade immediately after registration, or any time you wish from your dashboard main page.
1. Choose the subscription plan you wish to sign up for.
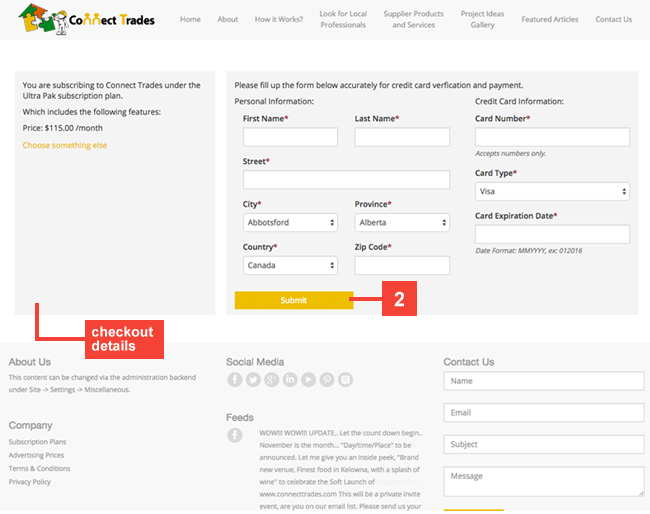
2. On the left side of the payment page, you will see your checkout details and to the right, fill in the fields as accurately as you can and click on submit to start processing your payment.
3. If all data has been validated and the payment processed, your subscription plan in your dashboard should now reflect your plan changes.
Note: You can refer to our Subscription Plan Pricing page for details on each subscription plan.
ConnectTrades allows you to add other users into your CT Contact List so you can have a quick access to their contact information, send them a message in ConnectTrades and a quick link to their public profile pages.
The Contact List can be accessed in 2 ways,
1. Through the dashboard main page by clicking on Dashboard on the top bar and clicking on the Profile link on the dashboard left sidebar.
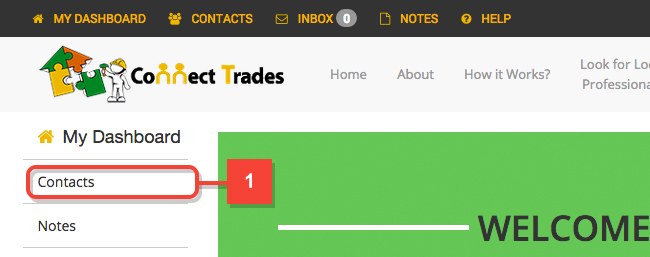
2. Through the direct link 'Contacts' found in the left-hand side of the top bar.

Adding users to Contact List
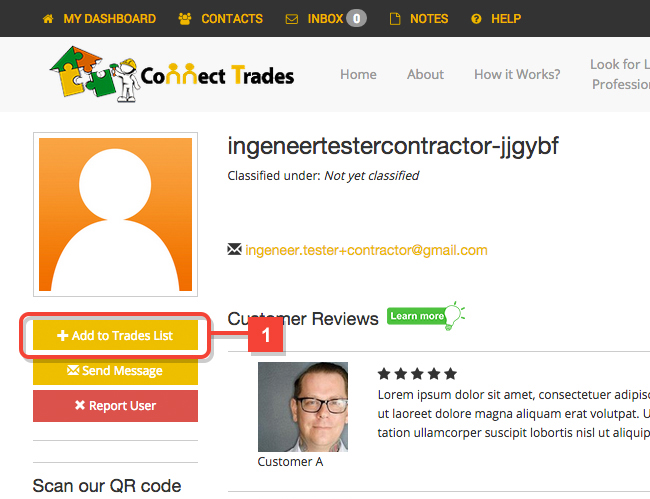
Users can be added to your CT contact list by simply clicking on the 'Add to Trades List' button.
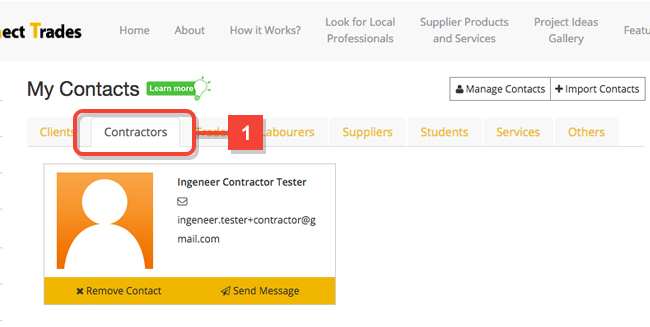
Your contacts are grouped according to the user's profile type. So if you want to find a Contractor in your contact list, you can just head to the Contractors tab in your contact list to find all the contractors you have added.
Deleting users from Contact List
You can remove a user from your contact by doing either of the following,
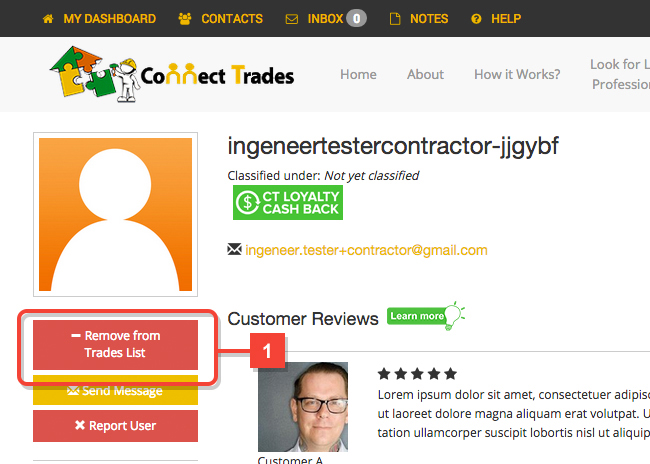
1. Go to the user's public profile and click on the 'Remove from Trades List' button below the profile picture.
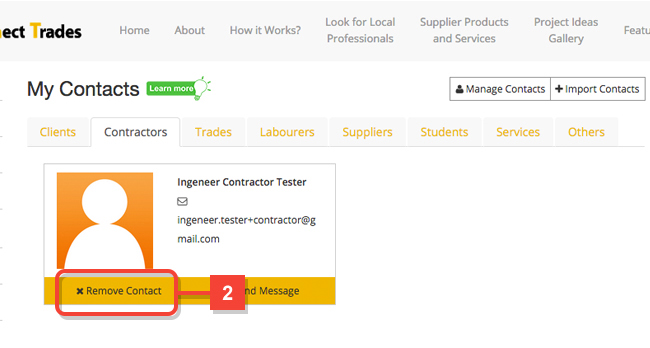
2. In your Contacts page, find the user you want to remove and click on the 'Remove Contact' button under the user's profile picture.
ConnectTrades has an internal messaging that allows you to send, receive, and manage messages to/from registered users in CT.
Sending a Message
You can send messages to other users in several ways.
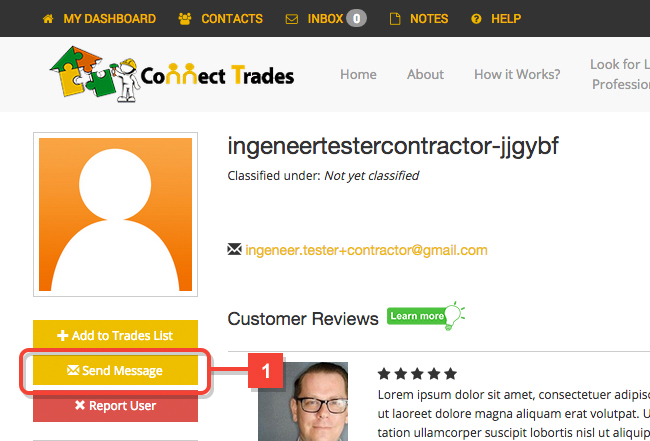
1. Through the users public profile. In every public profile, there will be a 'Send Message' button under the profile picture. You can use this to easily send a message to the owner of the profile you are currently looking at. The user does not need to be in your Contact List for you to be able to send them a message.
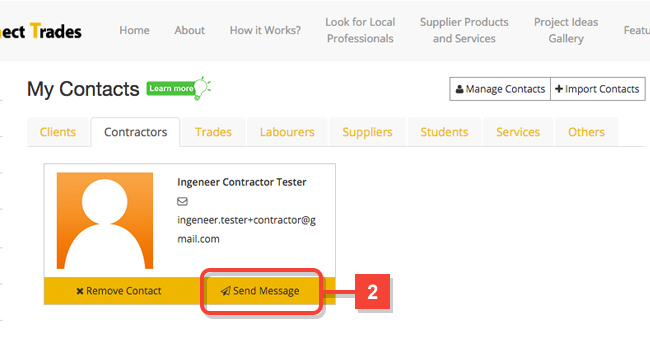
2. Through your Contact List. Adding a user into your contact list does not only allow you quick access to their contact information. You can also send them a message by clicking the 'Send Message' button under their contact information summary.
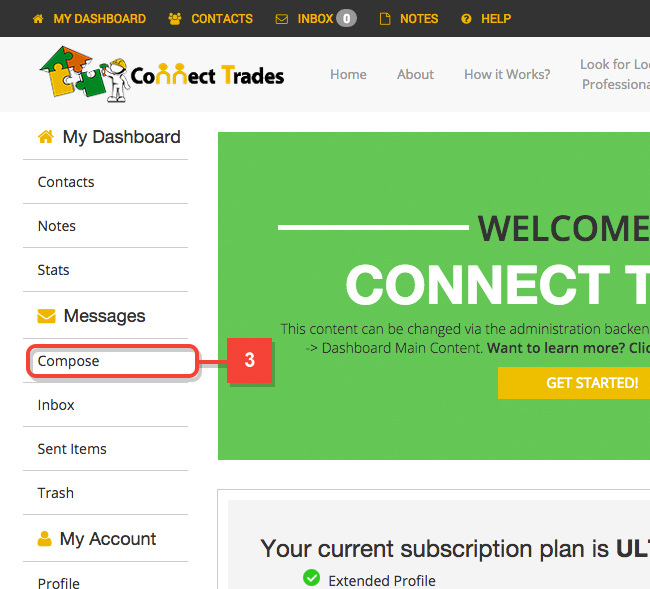
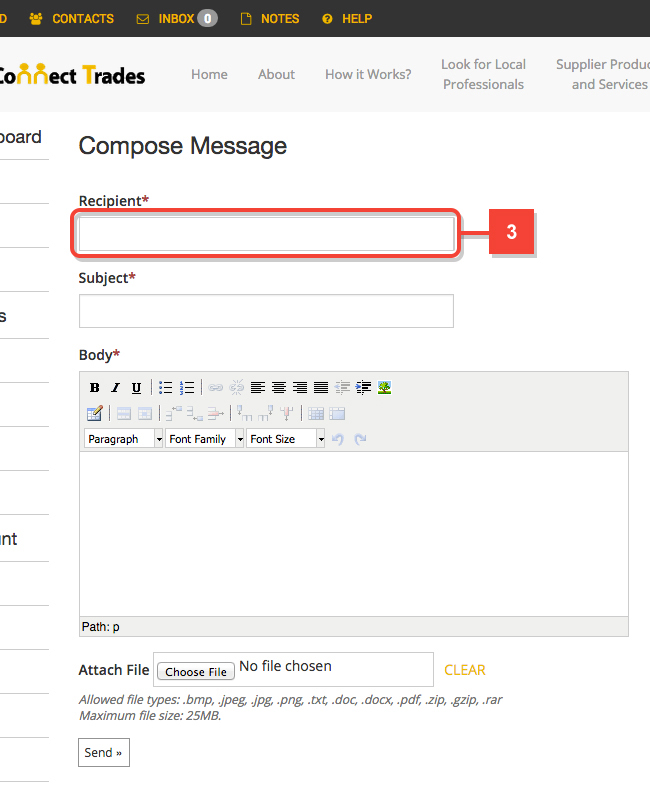
3. Directly using the Compose message page in your dashboard. If you know the user's CT registered email address, then you can directly input that in the Recipient field in the compose message form.
Reading Messages
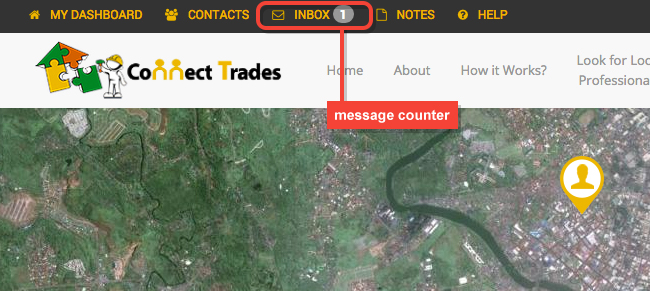
When logged in, you will see a direct link to your inbox on the top bar with a number beside it. This number is your message counter. It displays the number of new/unread messages you have in your inbox.
When clicking on this link, you will be directed to your Inbox page. Here you will see a table of all the messages you have in your inbox. Along with several details like sender, subject, and date recieved
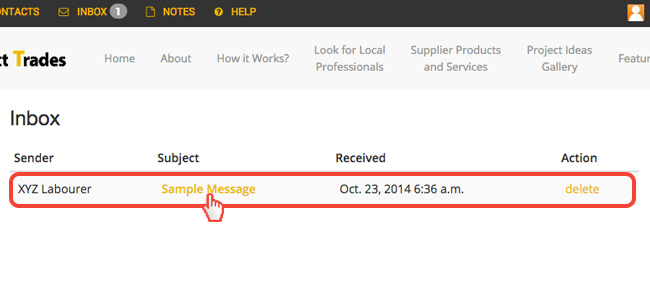
To read a message from the list, simply click on the message subject, and this will open up the message for you.
Replying to a Message
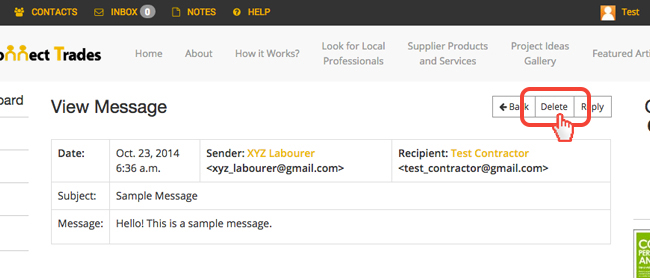
When opening a message to read it, you will be presented with a couple of action buttons.
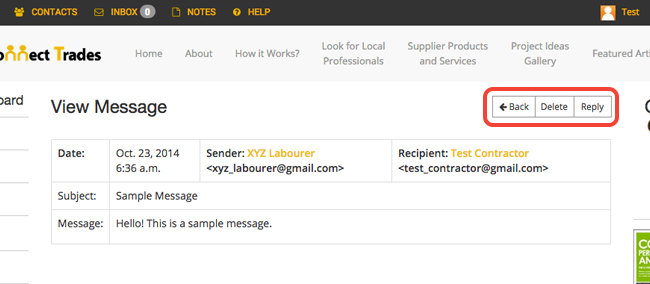
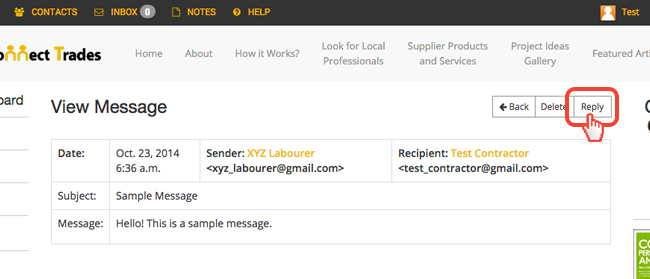
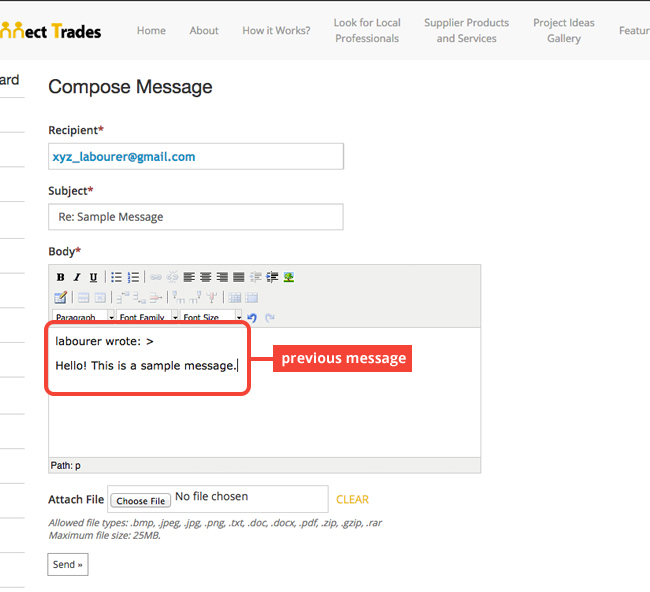
Click the Reply button to reply to the current message already opened. In the body of the Reply page, the previous message will already be placed in the text area for reference, like a message thread. You can delete this though if you want.
Sent Messages
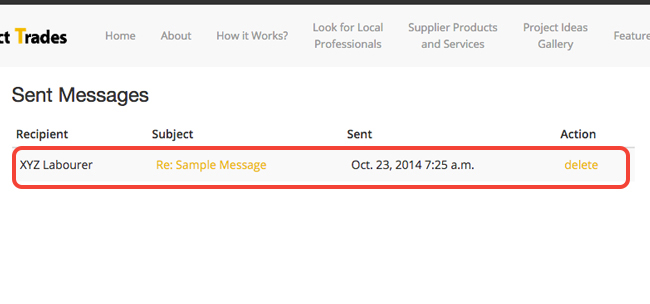
The Sent Items page will contain a copy of all the messages you've sent. This will function like a regular message in your inbox. If you need to add a follow-up message or reply to a previous one you've already sent, you can do so here.
Delete Messages
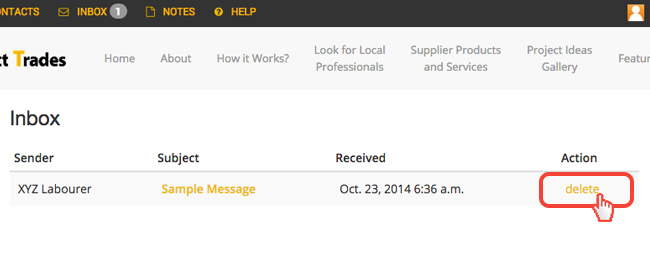
To delete messages form your Inbox or Sent Items, you can either click the Delete link in the Action column of the list
or, click the Delete button on the upper right when you open up a message.
Also, you can access any of the messaging pages in your dashboard.
The Profile update page will contain several fields which you can fill up to populate you public profile. Your public profile will be open for everyone to see. So fill these in the best you can to promote yourself and get those potential customers to do business with you.
The Profile page can be accessed in 2 ways,
1. Through the dashboard main page by clicking on Dashboard on the top bar and clicking on the Profile link on the dashboard left sidebar.

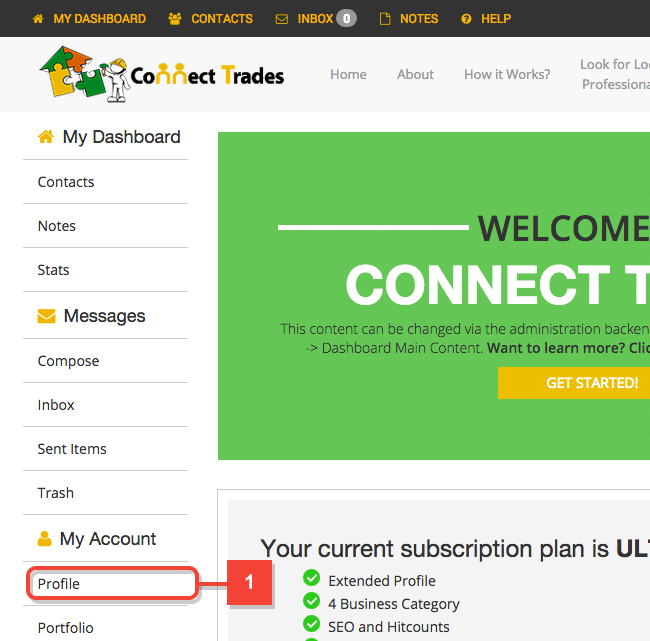
2. Through the direct link 'My Account' found in the right-hand side of the top bar.

This page will differ from one profile type to another. Most of the fields are common and self explanatory. I will list down the important ones below.
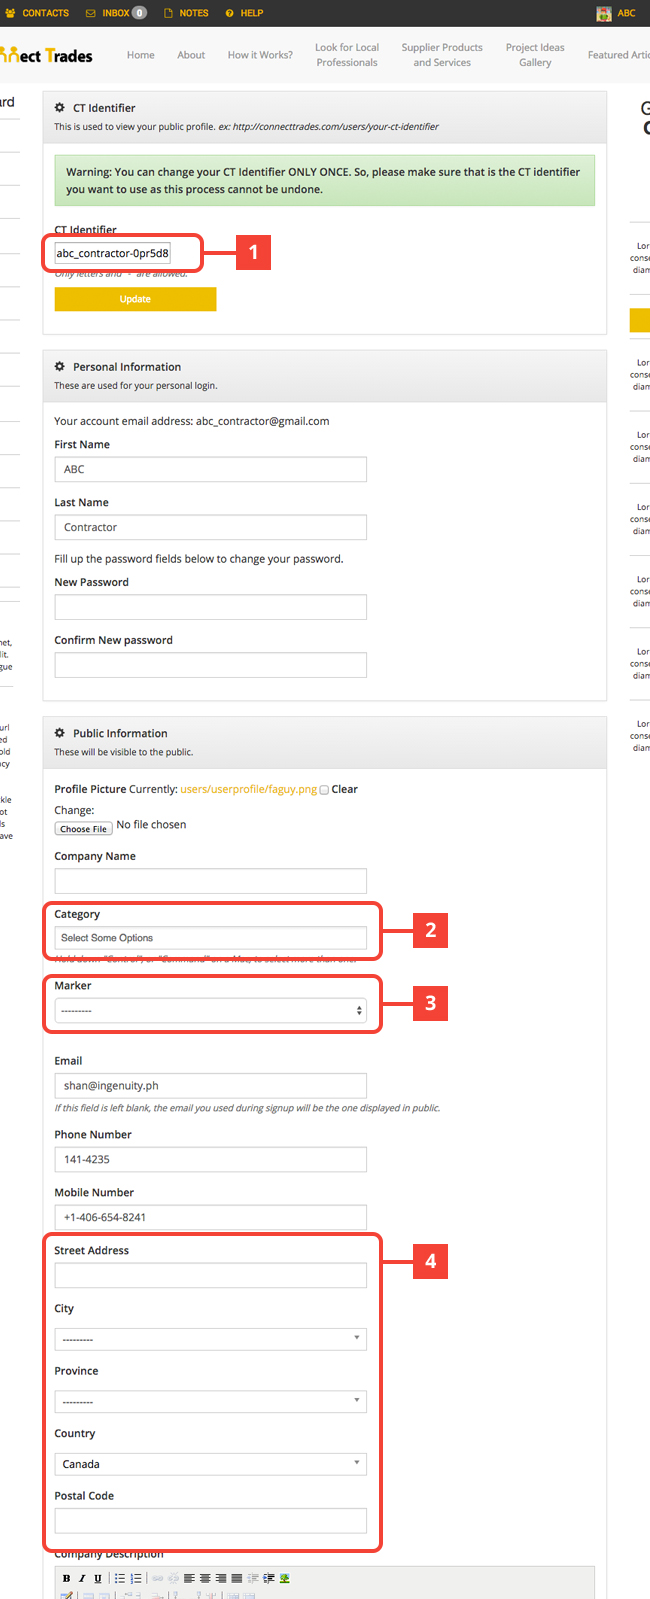
1. CT Identifier - This is equivalent to your public profile link. You can only edit this ONCE so be sure you know what profile URL you want before trying to update this. You might want to make it easy to read and remember. For example, if your company name is 'ABC Contractor', you might consider a CT Identifier like 'abc-ontractor' or 'abccontractor'.
2. Category - Higher subscription plans will be able to select more categories compared to lower ones. This is important in searches as this will be used in filtering which profiles will be included in the search result.
3. Marker - For paid subscription plans, including the 30-day trial, you will be able to select a custom marker icon to use instead of the default one. This will be useful in helping users identify your type of business easily in our maps. Custom marker icons will be used in all maps; homepage, search page and public profile page.
4. Address - This includes Street Address, City, Province, Country and Postal Code. It is important to fill these in properly so that the map markers and get directions feature will be as accurate as they can be.
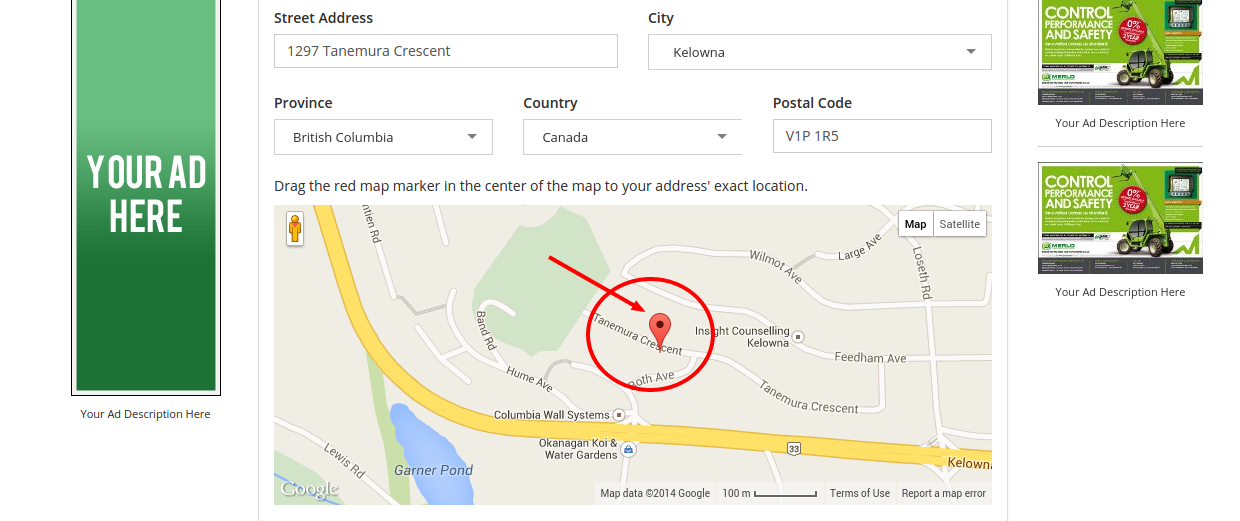
Setting Map Marker
Under the address location fields, we have provided you with a map, so you can place exactly where your map marker should be on the maps (Home page, Search page, and public profile page)
To set your marker, just simply drag the red marker in the center of the map to the location you want to mark. You can zoom in the map if you need to and to get a more accurate location.
Once you've done that, fill in the rest of the profile information if you haven't and save the profile changes by clicking on the update button.
ConnectTrades allows you to create an album and upload images to showcase your works or ideas to the potential customers. For Homeowners, this will be your Project Ideas gallery. For Suppliers, this will be your Promotions Gallery. And for other professionals, this will be your Portfolio.
You can access your gallery by clicking on 'Dashboard' on the top bar, and clicking on Portfolio on the dashboard left sidebar.
Create an Album
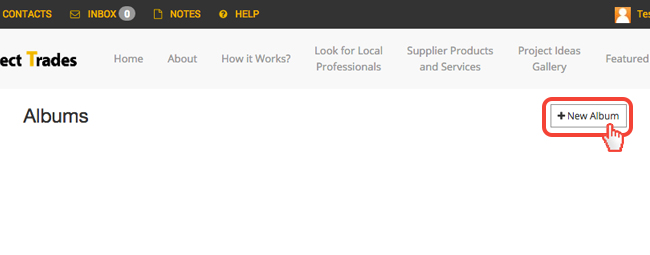
In the portfolio page, click on the New Album button on the upper right of the page.
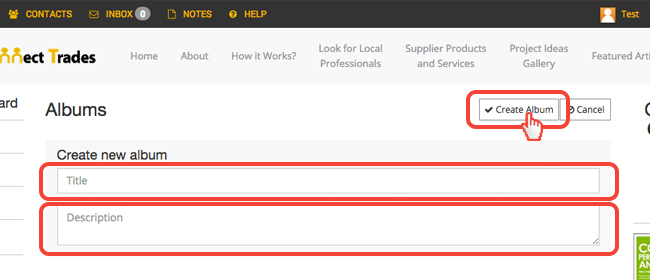
This will reveal 2 fields where ou can set the title and description of your new album. Once you've filled up the fields, click on the Create Album button on top of the fields.
Delete an Album
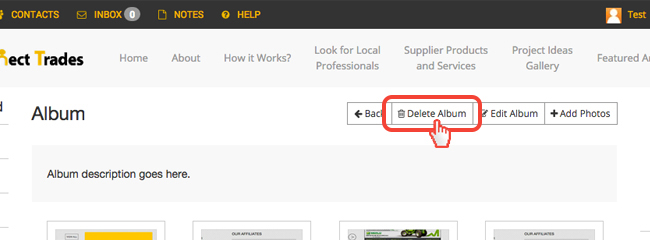
To delete an album, open up the album, and in the Manage Album Page, click on the Delete Album button on the top right. Do note that this will not only delete the album, but will also delete the images.
Add Images to Album
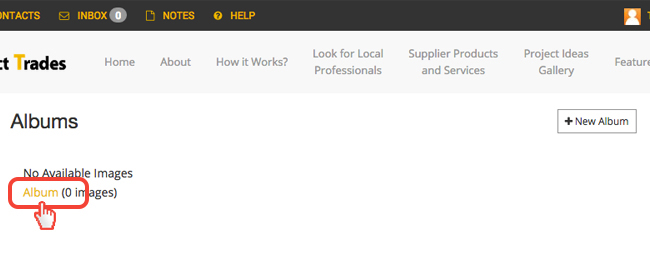
Once you have created an album, click on the album thumbnail or title to open it up.
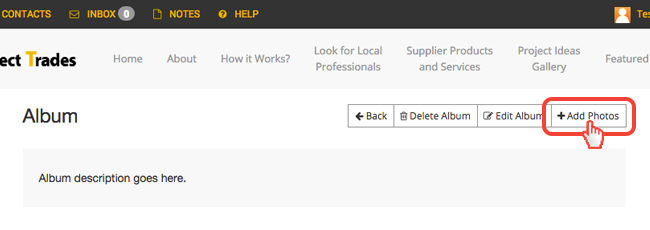
Inside the album, you will be presented by several action buttons. Click on the Add Photos button to reveal the upload form and start adding photos.
Click on Add Files to open up the file browser and select files you want to add to the upload queue.
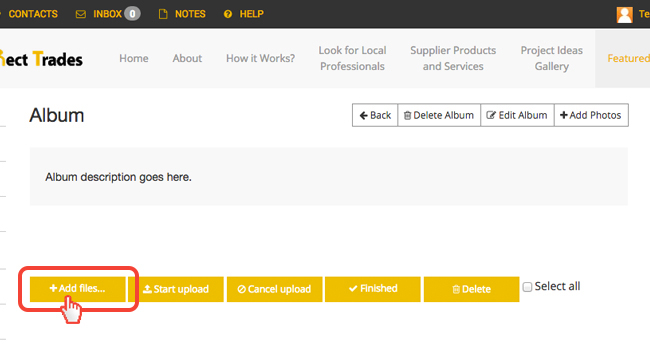
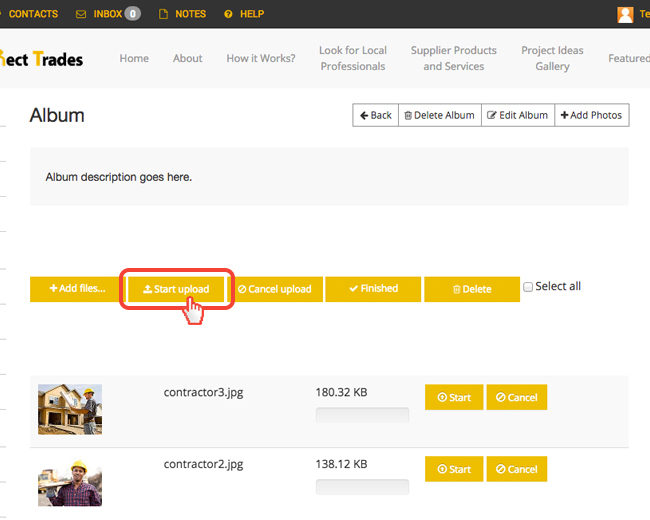
Once, you have file in the queue, you can click on the Start Upload button on the top to start uploading everything in the queue.
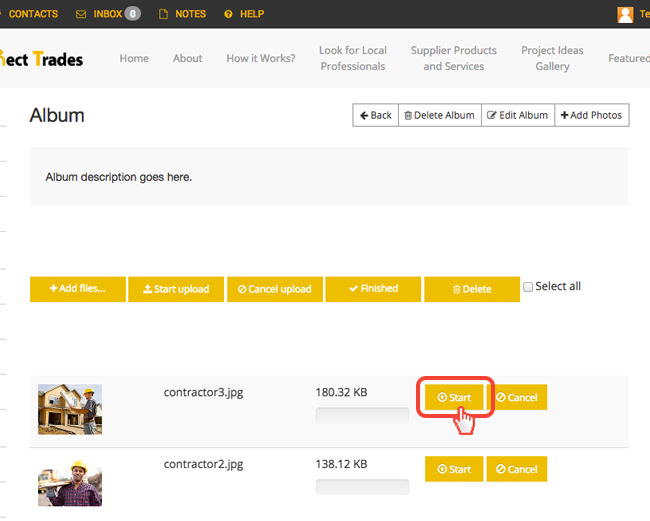
Or you can start the upload for individual files by clicking on the Start button to the right of the image you want to upload.
Update Images in Album
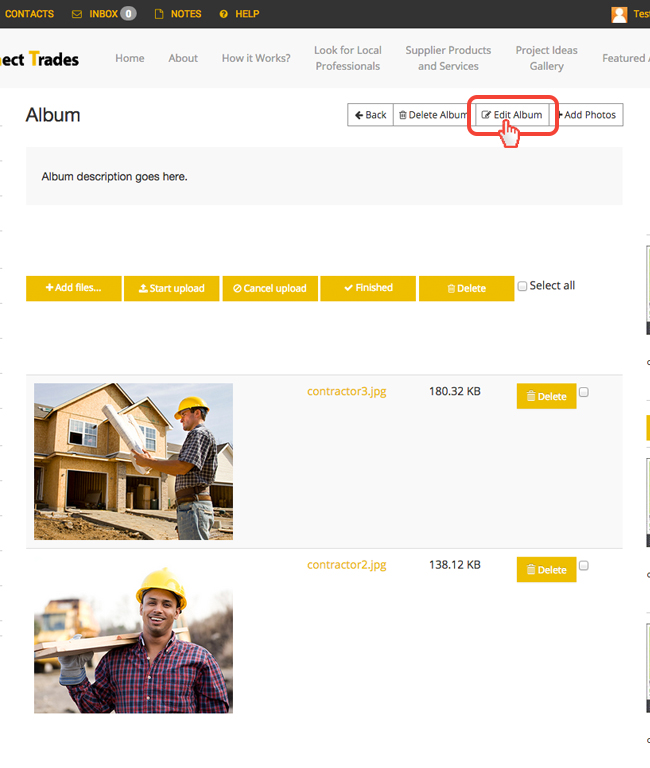
Inside your album, click on the Edit Album button on the top right part of the page where the action buttons are located.
This will open up a page where you can edit various parts of your album.
1. Edit the album title and description.
2. Edit individual photo's title and description.
3. Delete a single photo. Check the checkbox on top of the image if you want to delete the photo.
4. Select which existing albums the photo belongs to. A single image can be part of multiple albums. Meaning, if you uploaded an image in one of your albums, and also want it to belong to a different album, then you can do so without re-uploading the image again into the other album.
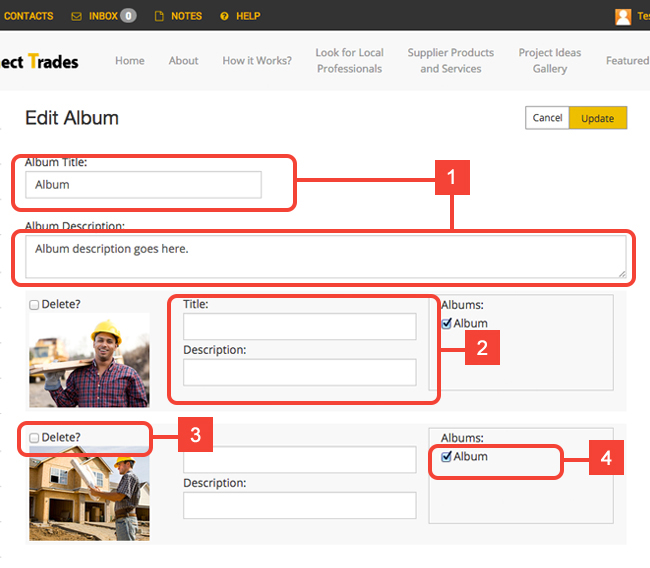
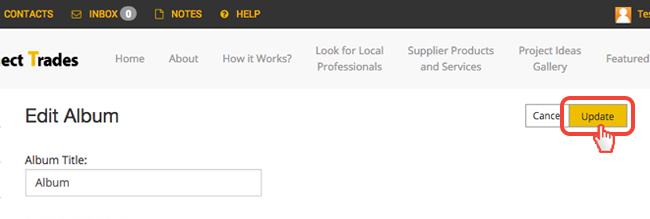
When you're done with all the changes, click on the Update button on top of the page to save all your changes.
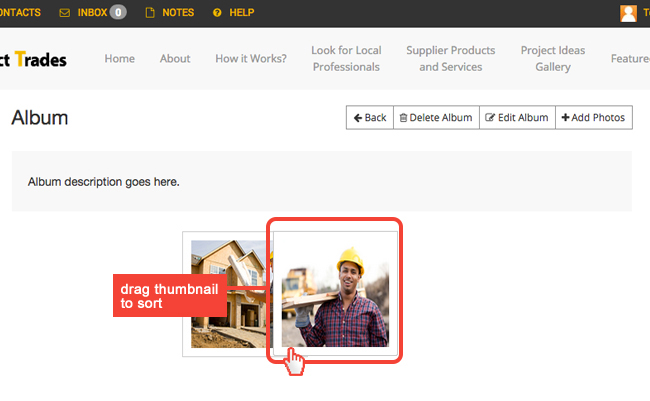
Sorting Images
While inside an album page, you can also drag the images around and arrange them in any order you want. Do note that the first image in your album will be your album's cover photo.
Certificates are used to identify or tell which Contractor is Certified or not. This is very helpful information and could affect how home owners choose which Professional they want to hire.
Contractors subscribed with Certificate features, will have a certificate section in their public profile's sidebar. This section will contain badges for each available certificate.
Grayed out certificate badges(1) mean that the Contractor has not submitted a certificate or the certificate is still under verification by a Connect Trades Admin. While full coloured certificate badges(2) means that the certificates are valid and up to date as verified by Connect Trades admin.

Contractors subscribed to the Ultra Pak or Premium subscriptions will have the ability to upload certificates and earn badges for their public profile.
To upload a certificate,
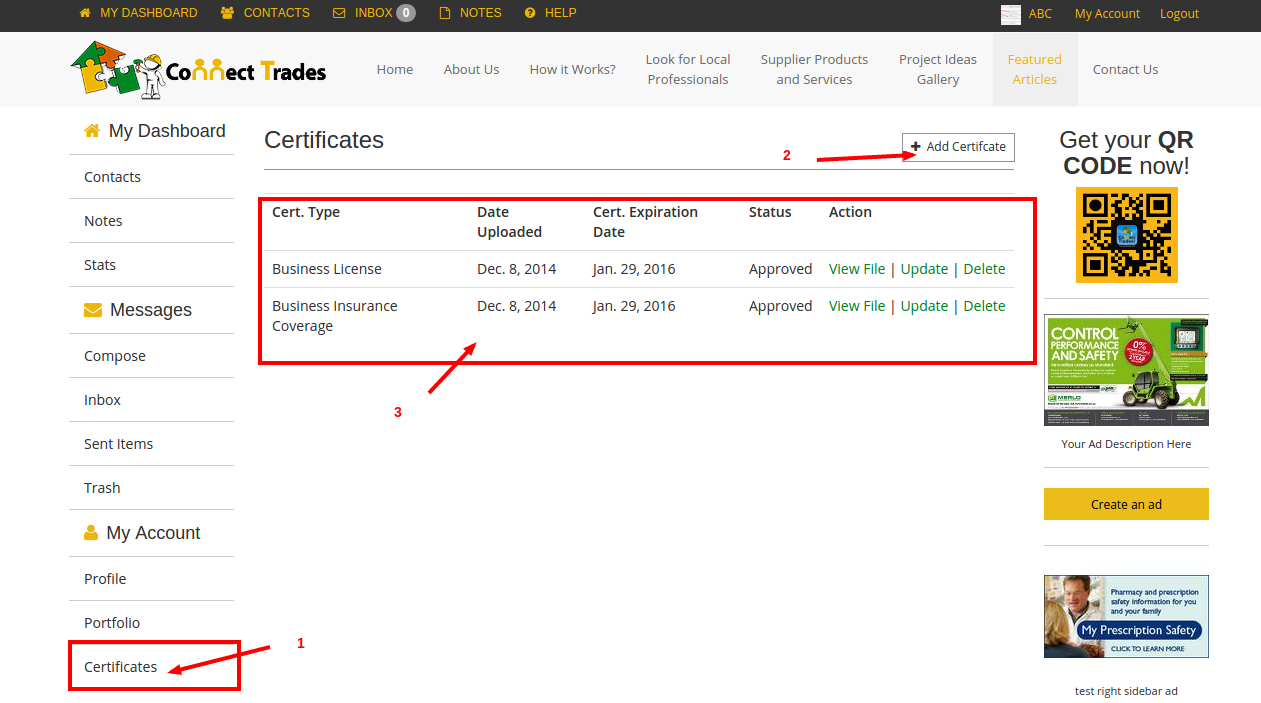
1. Login to your account and head over to your dashboard, and click on Certificates to open up the certificates page.
2. In the certificates page, click on Add Certificate to upload a certificate for verification.
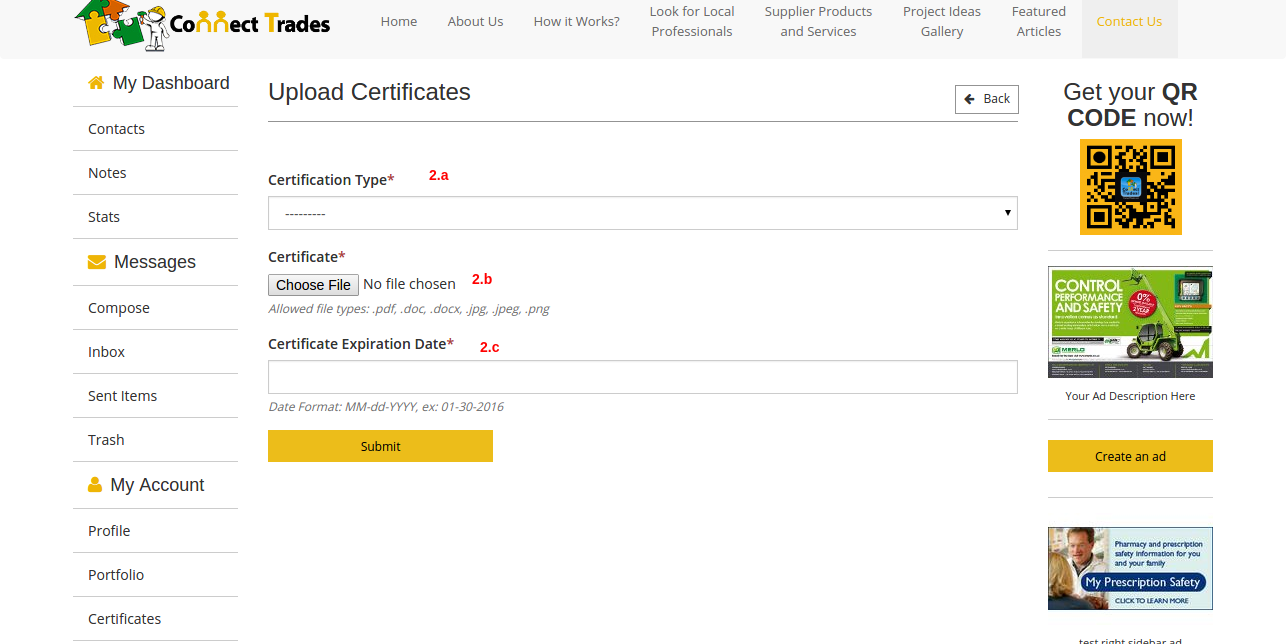
2.a. In the upload page, select the certificate type.
2.b. Upload the file, image, scanned document.
2.c. Specify the Certificate Expiration Date. This will be checked and verified along with the document by CT administrators.
3. You will also see a table of all the certificates you have uploaded and there status.
For Homeowners, we also provide Video Stream links where you can watch some construction videos while you stay in CT and wait for a response to the message you sent perhaps? Or if you have some free time and don't want to be just idling by, you can watch videos from our streaming list.
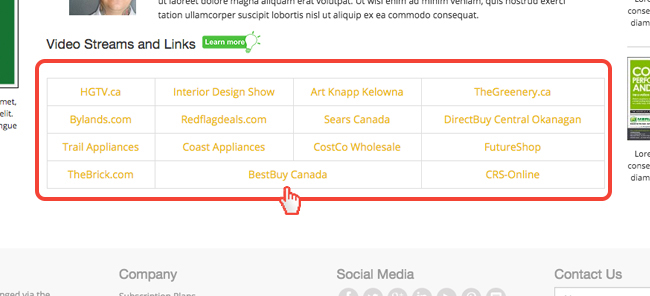
Feature will be coming soon!
Feature will be coming soon!
Ads in ConnectTrades run in a carousel of varying sizes and are also city-based, which means that you get to set for which city your Ads will be prioritized for display. For example, if you have an ad which is set for the city of Kelowna, and someone in Kelowna is going to view ConnectTrades. Then your ad will be prioritized to show up on the site compared to the ads that are set for Armstrong or Enderby. This however does not mean that you will always be first to show up. We pull ads at random based on city. This will ensure that everyone subscribing to the same ad spot will have the same chances of being seen first in the carousel.
To advertise with ConnectTrades, you will either need to be signed up as a Supplier or an Advertiser. To signup for a supplier account, you can follow the Login & Signup section above.
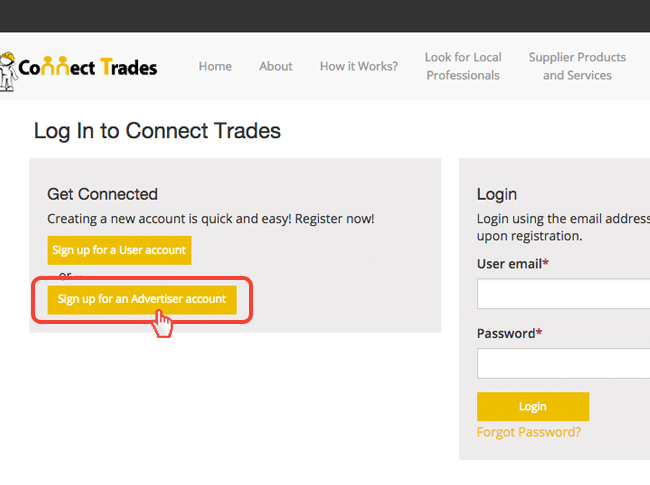
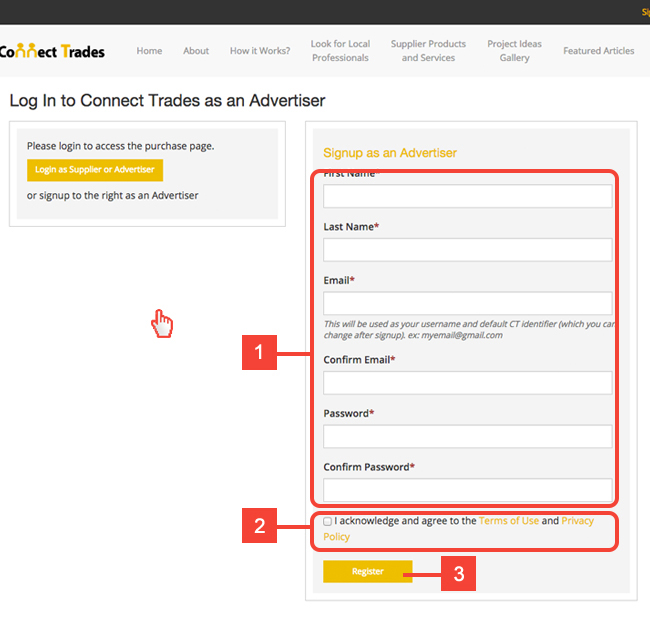
To sign up for an advertiser account, head to the login page and clicking on the 'Sign up for an Advertiser Account'. This will take you to the registration form for advertisers. Signing up for an advertiser account, takes only 3 steps.
1. Fill in the form on the right side of the page
2. Agree to the Terms & Conditions and Privacy Policy
3. And finally, click on the Register button.
Once registered, you can login to your advertiser account anytime through the login form.
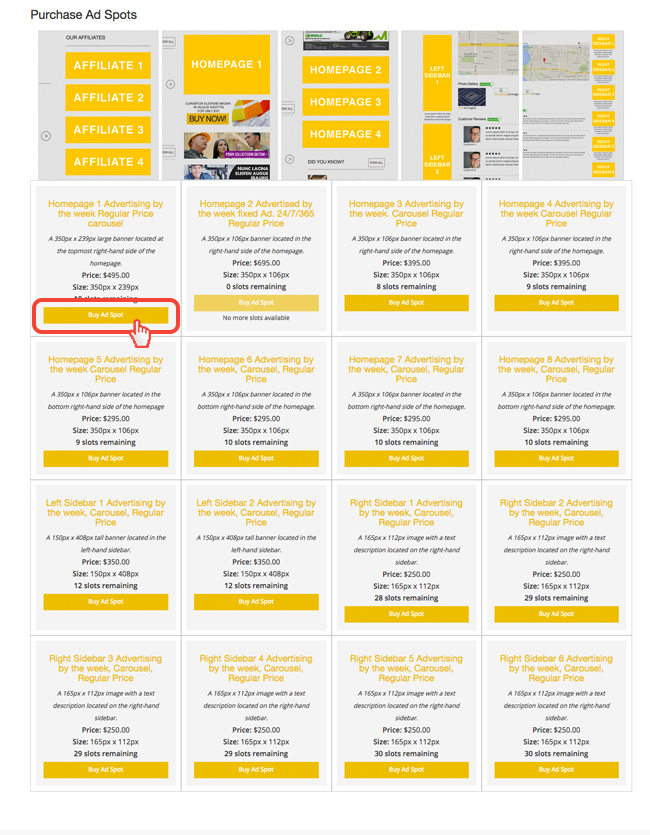
To purchase an ad, go to the Ad Pricing page and select which Ad Spot you want your banner to show. Click on the 'Buy Ad Spot' button of your choice. You will need a PayPal account to purchase Ad Spots.
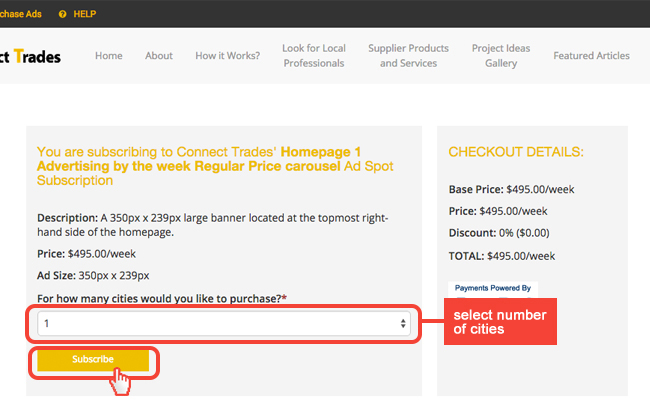
In the payment page, select how many cities you are planning to show your ads to. Price will depend on how many cities you select. We do offer discounts of up to 15%, starting from 5 cities. Check your payment details, then click on the Subscribe button to proceed with the PayPal checkout.
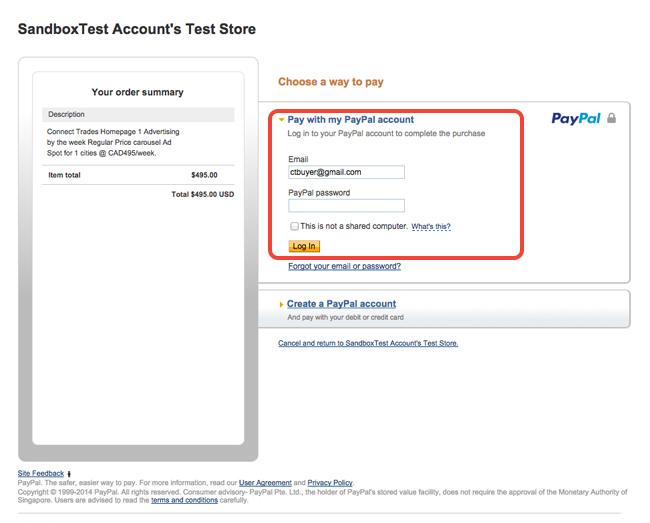
From here, just follow PayPals, checkout forms to complete your transaction. Payments may take several hours to days to process, please be patient if your purchase is not immediately activated.
** Prices and discounts may vary from what is written in this guide. Refer to the Pricing Pages for a more accurate figure.
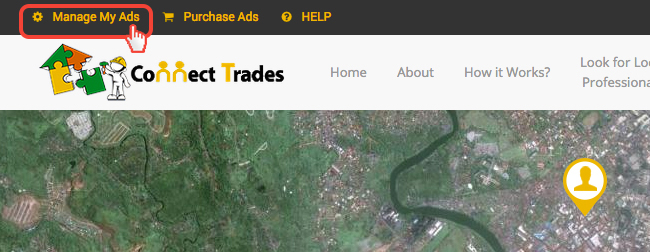
To go to the 'Ad Management' page, (login) to your advertiser account and click on the 'Manage My Ads' link. For Supplier Accounts, the link to your 'Ad Manangement' page will be in your dashboard left sidebar.
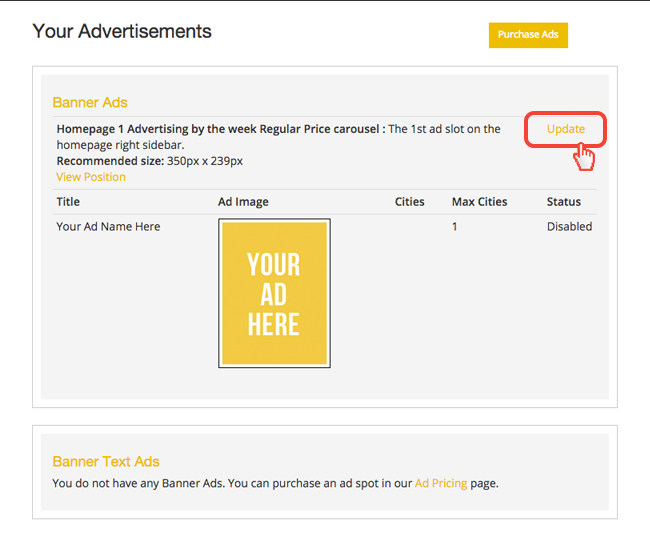
In the Ad Management Page, you will be presented with 2 tables. The first one is for Banner Ads and the second one is for BannerText Ads. The difference between the 2 is that BannerText Ads allow you to add a description below your ad banner.
To update a purchased Ad Spot, click on the Update button on the upper right of your Ad Spot record. This will open up a page where you can, update your ad title, description, banner, link, and city range.
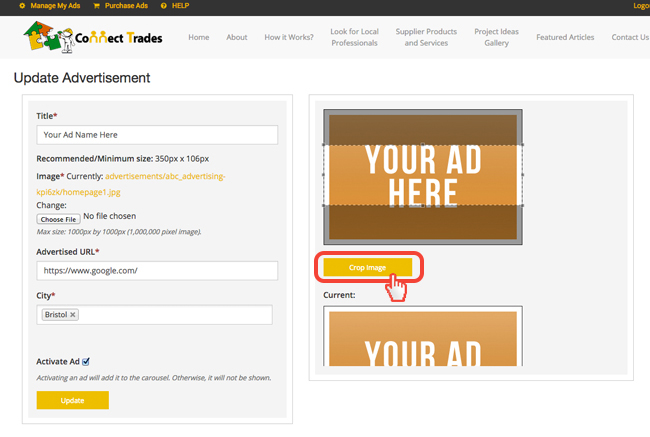
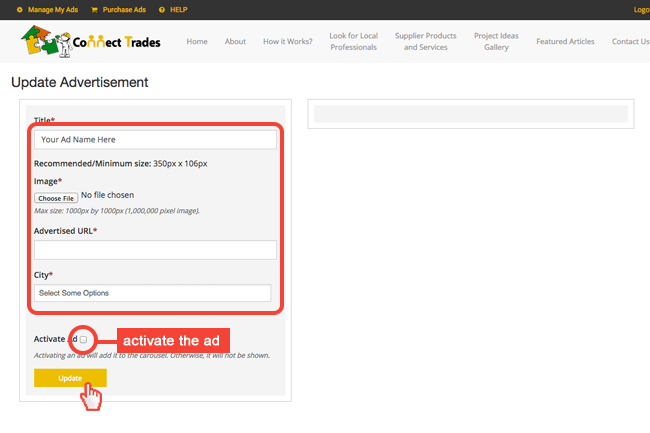
To the left of the page, you will see several fields, fill these in to setup your banner. Do not forget to check the Activate checkbox. If you don't your banner will not be shown on the website. This is useful if your current banner is no longer valid, say, if the product sale you've advertised has expired, then you can deactivate the ad spot temporarily while you consider other banners to replace it. Once filled in, click on the Update button to save your changes.
Once you have saved your changes, your banner should load up to the right side of the page, as well as a current view of what your banner will look like placed in the ad spot you purchased, if it does not fit perfectly, you can try and crop the image to your liking by dragging your mouse over the top image.
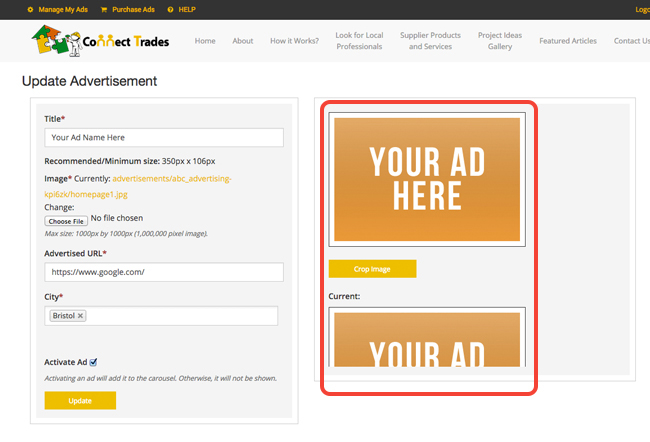
The cropping tool is locked at an aspect ratio equivalent to the ad spot you purchased. This means that your crop area, will always be the same shape and scaled size of the actual ad spot. This is to ensure that images fit the area perfectly and keep the CT template looking clean and crisp. Once you have selected your crop area, click on the Crop Image button to save the changes.
